How to Build Webparts and Widgets in Kentico

Introduction
The Kentico CMS product supports Webparts and Widgets. The main difference between a Webpart and a Widget in Kentico is that a webpart is associated with a template while a widget is associated with a specific page. These are essentially “components” that are a bundle of content and functionality. The process of creating a web part, widget, and page is detailed in the post through an example of the "Expert Callout" widget.
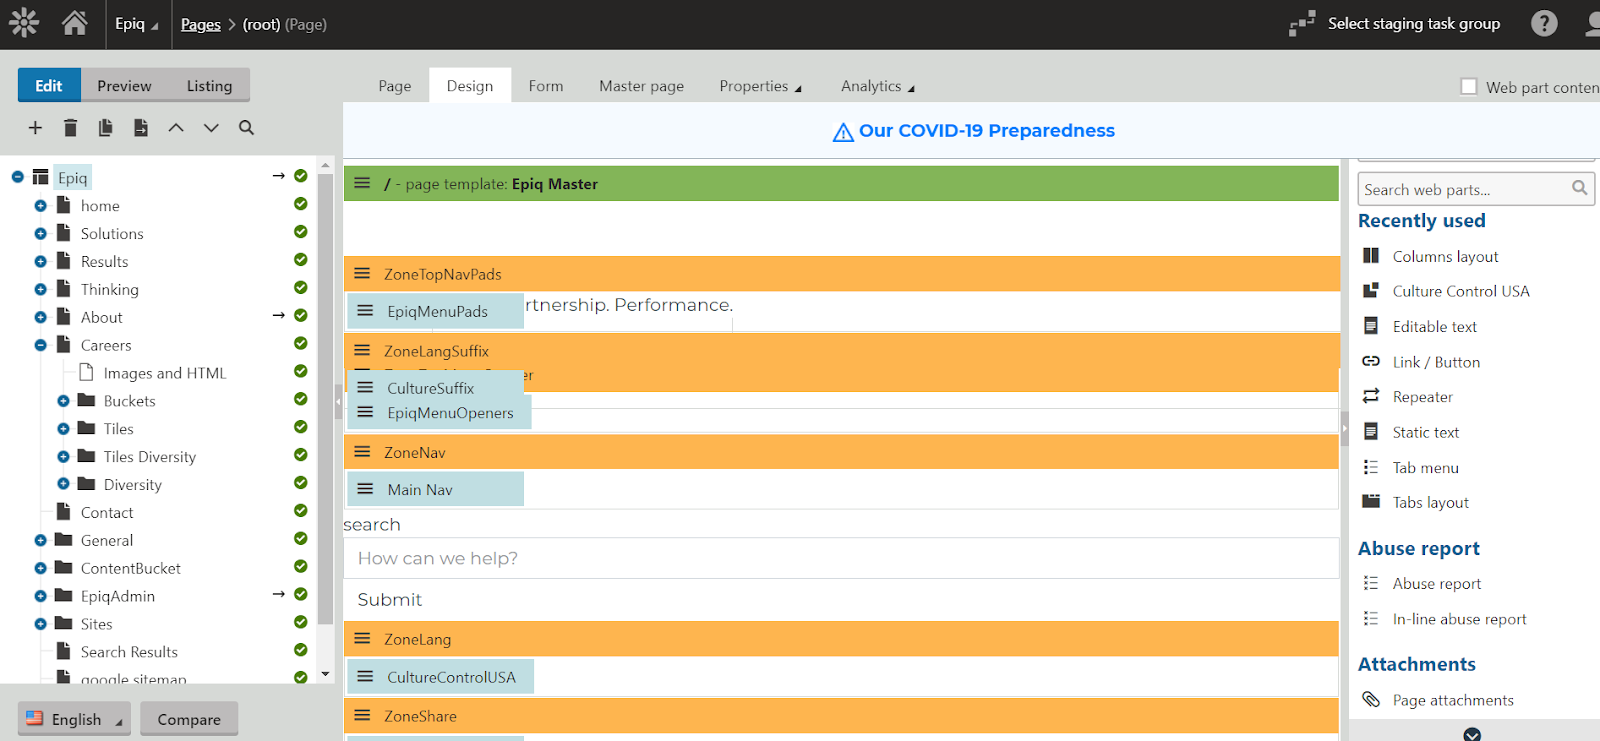
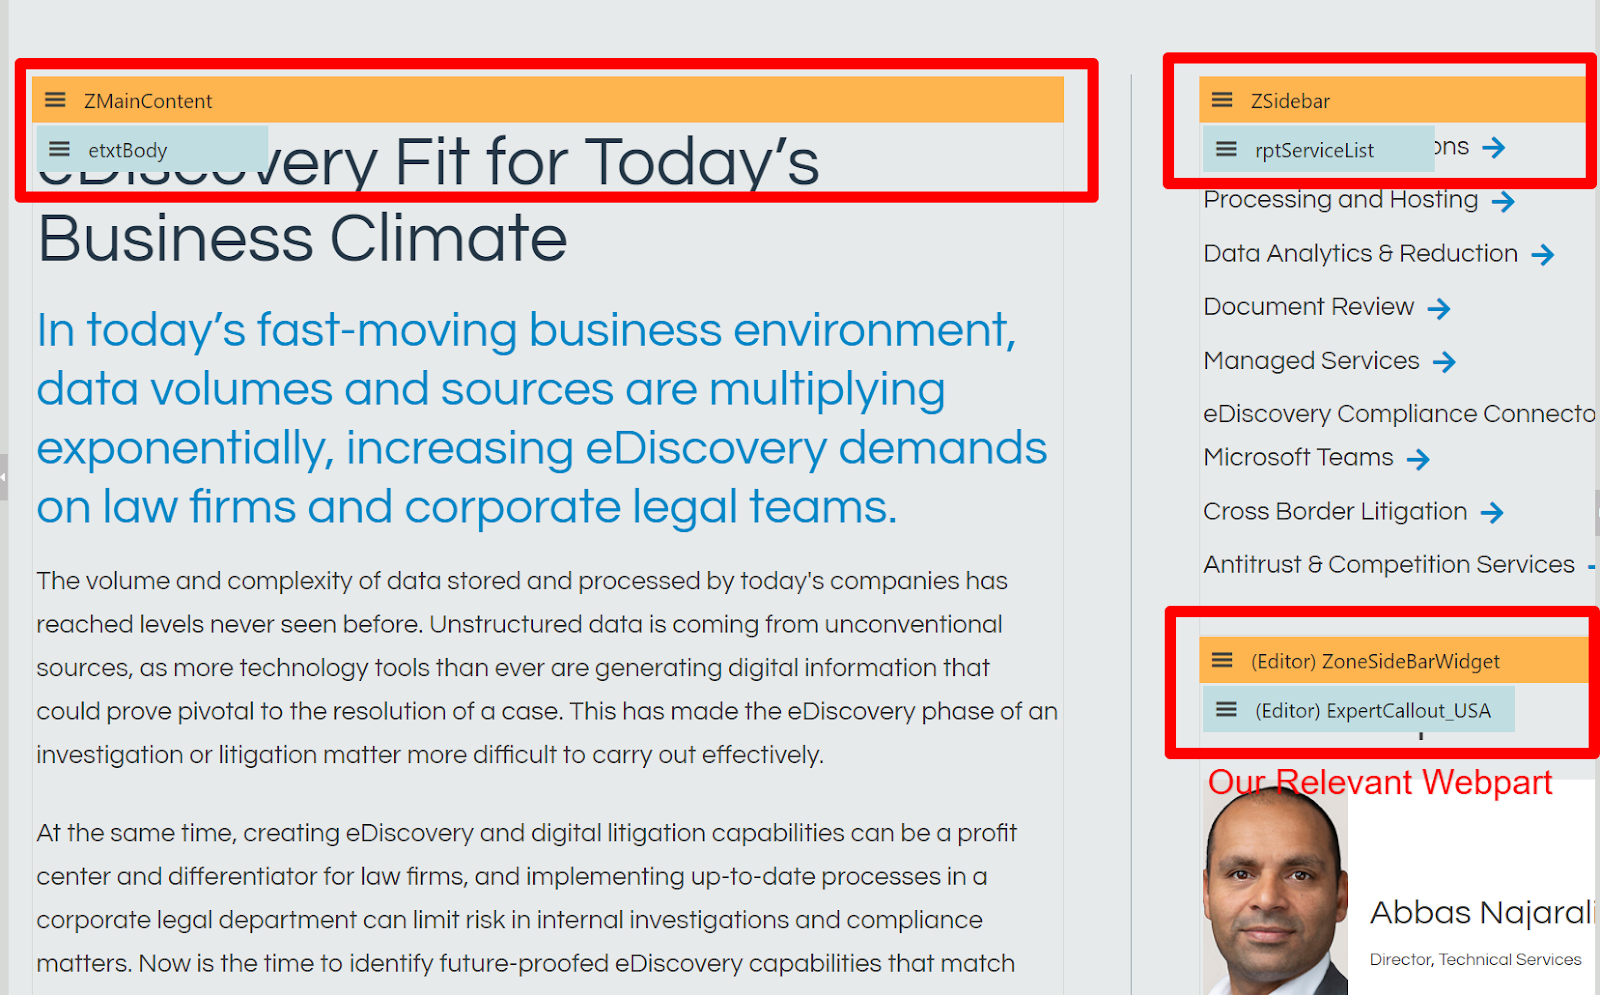
A template is usually constructed with a collection of these components, as shown in the screenshot below:
The major difference between a Kentico Webpart and a Kentico Widget is that a webpart is associated with a template while a widget is associated with a specific page (that builds on that template). In this sense, when you make a change to a webpart in a template, it will be reflected on ALL pages that use that template. In contrast, widget properties and data are stored at a page-level. Any changes that you make to a widget will affect ONLY that specific page.
The Client Use Case
The www.epiqglobal.com website has multiple solution pages. Each page has a specific expert assigned to it. For example, the eDiscovery solution has a specific expert:
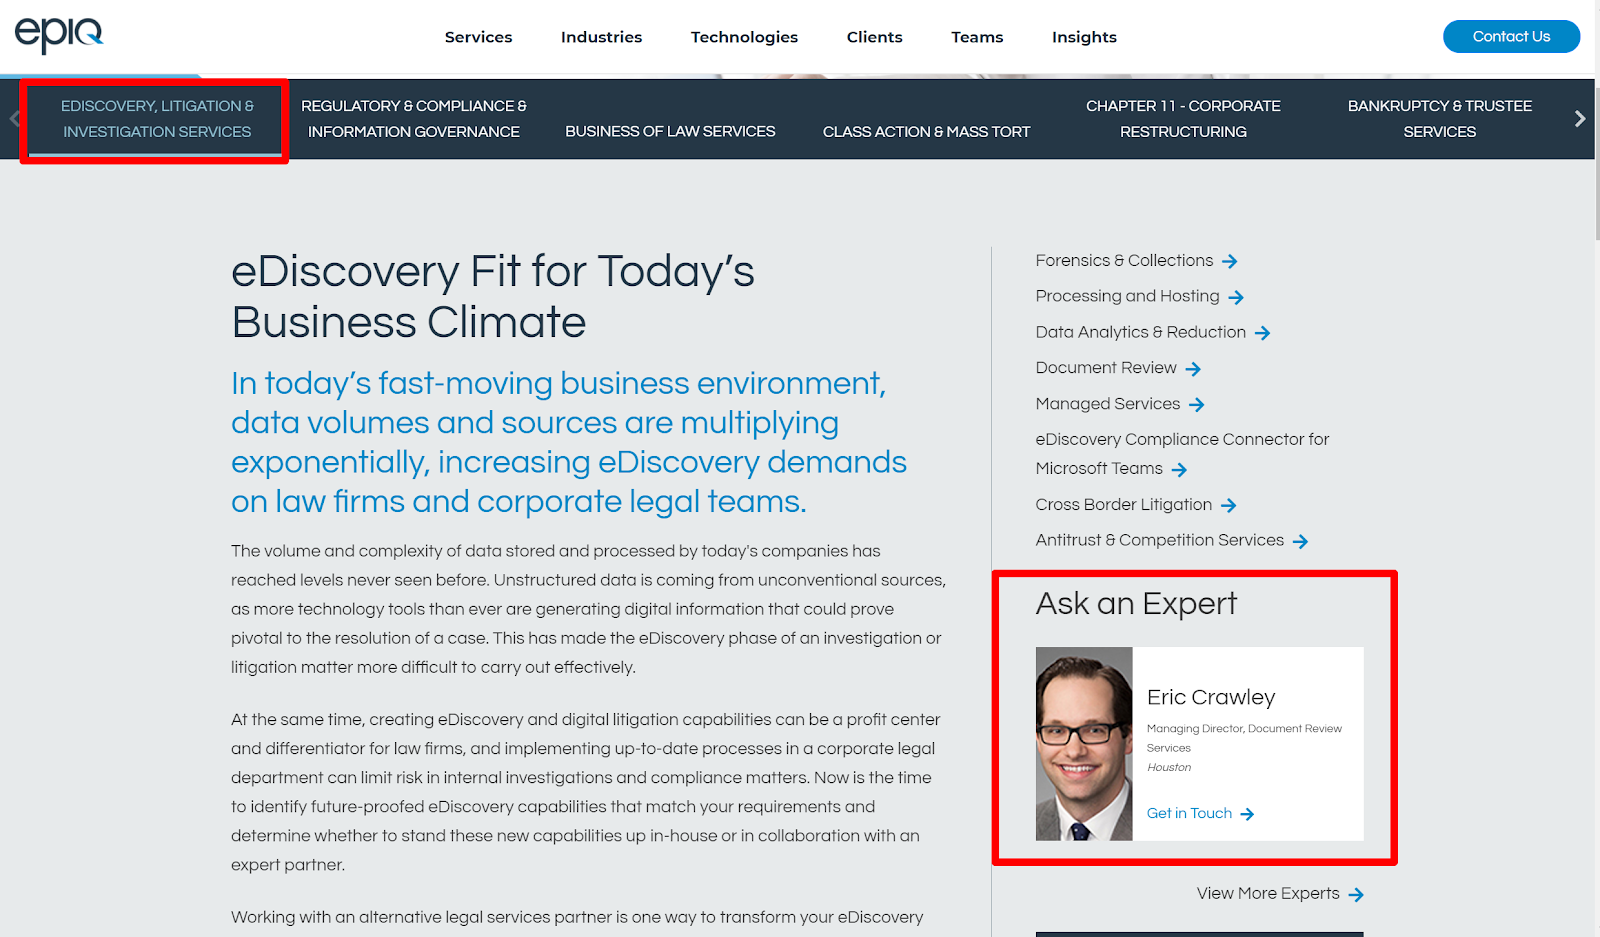
while the Regulatory & Compliance solution has a different expert.

This functionality can be achieved by designing a custom webpart and associating it with the template. It would eventually look like this:
We need a webpart that would give the content manager an ability to assign an expert to a specific page based on this template. After the content manager assigns an expert, the webpart will automatically pull up the expert details : image, name and title.
This functionality is not available in any of the default webparts. So we have to develop a custom webpart to achieve the functionality.
Creating a new webpart
Developing new webparts consists of three main steps:
- Create the webpart code files
- Register the webpart in Kentico
- Parametrize the webpart in Kentico, so that it can accept different parameters
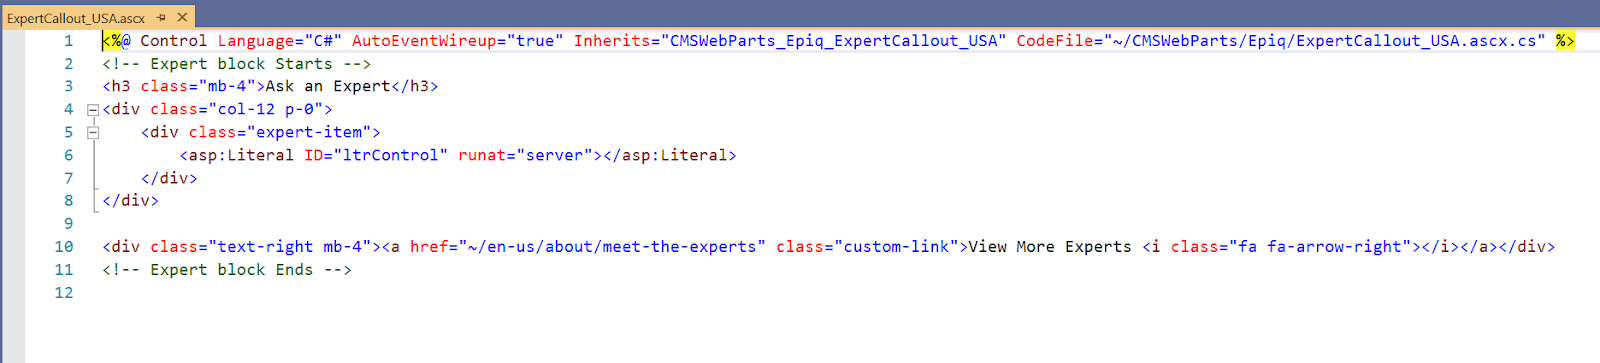
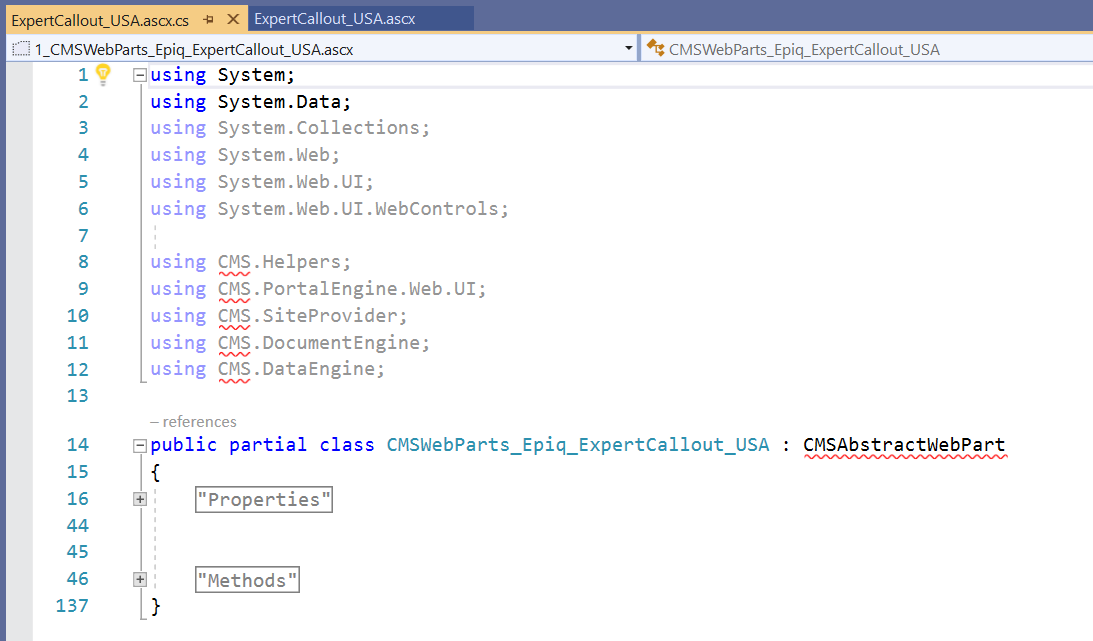
We create two user controls: ExpertCallout_USA.ascx and ExpertCallout_USA.ascx.cs. Both these inherit from an appropriate base class:
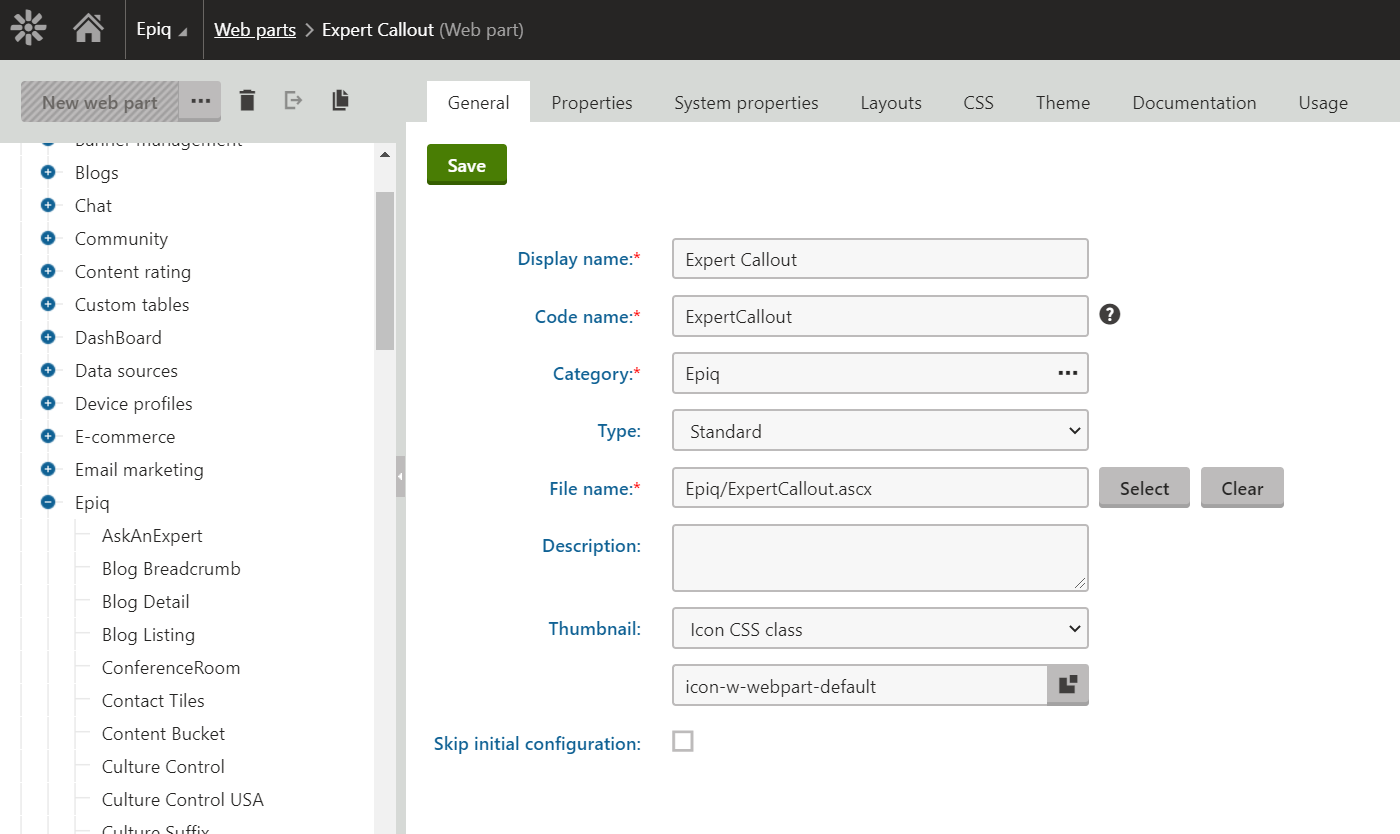
We then register this webpart as “Expert Callout” in the Kentico Webpart Admin section as shown below:
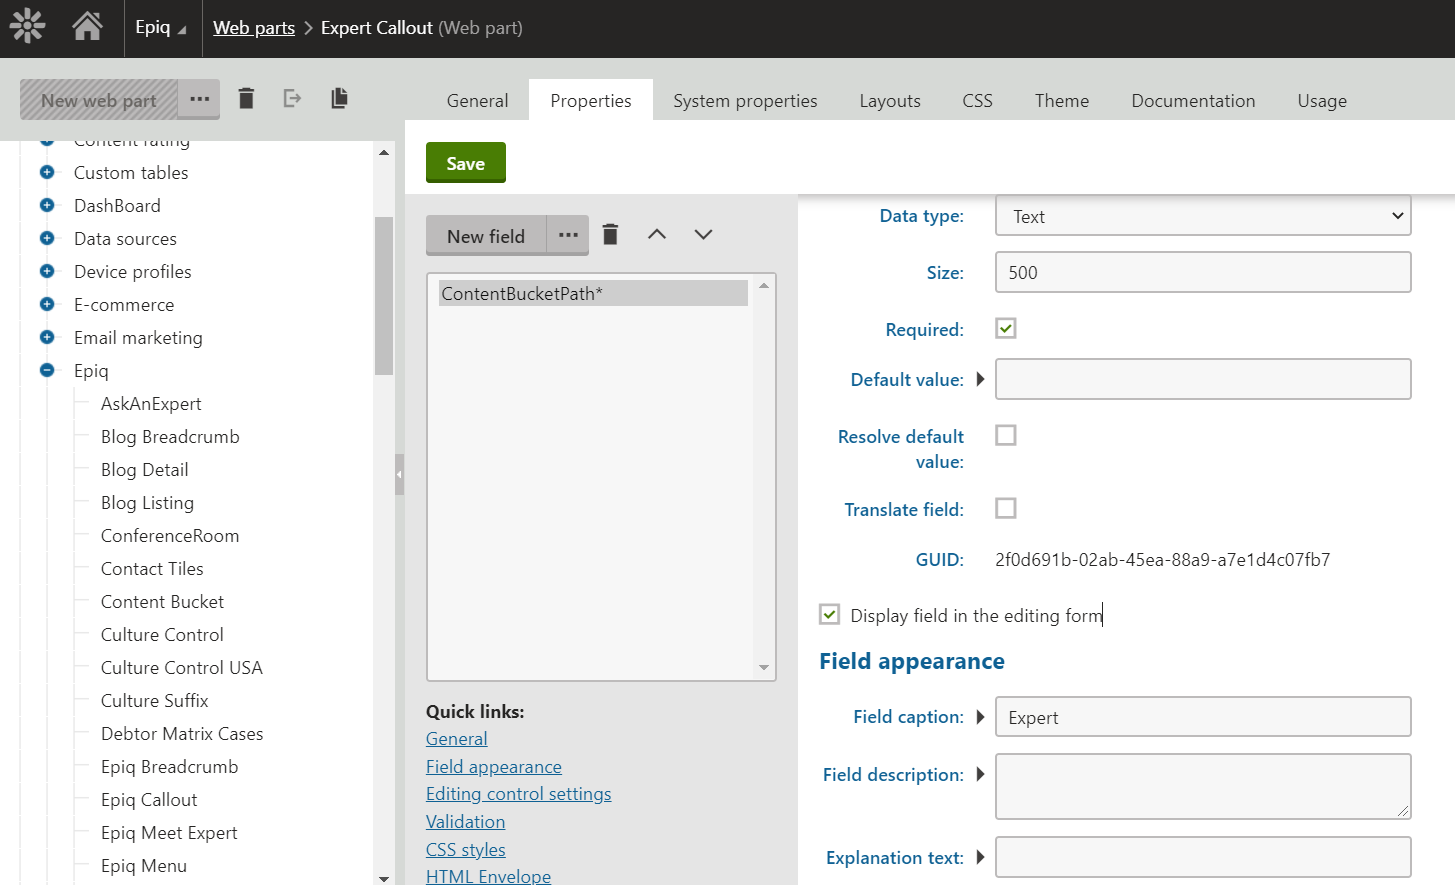
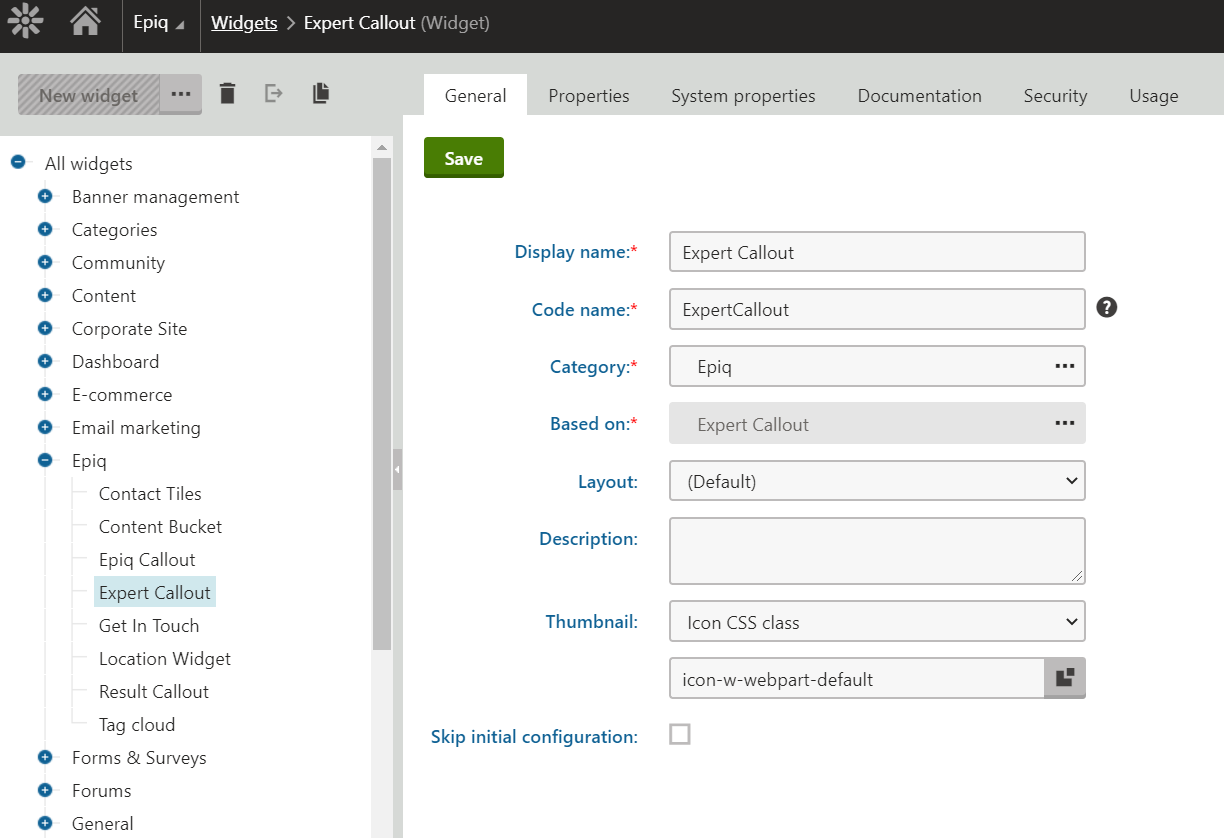
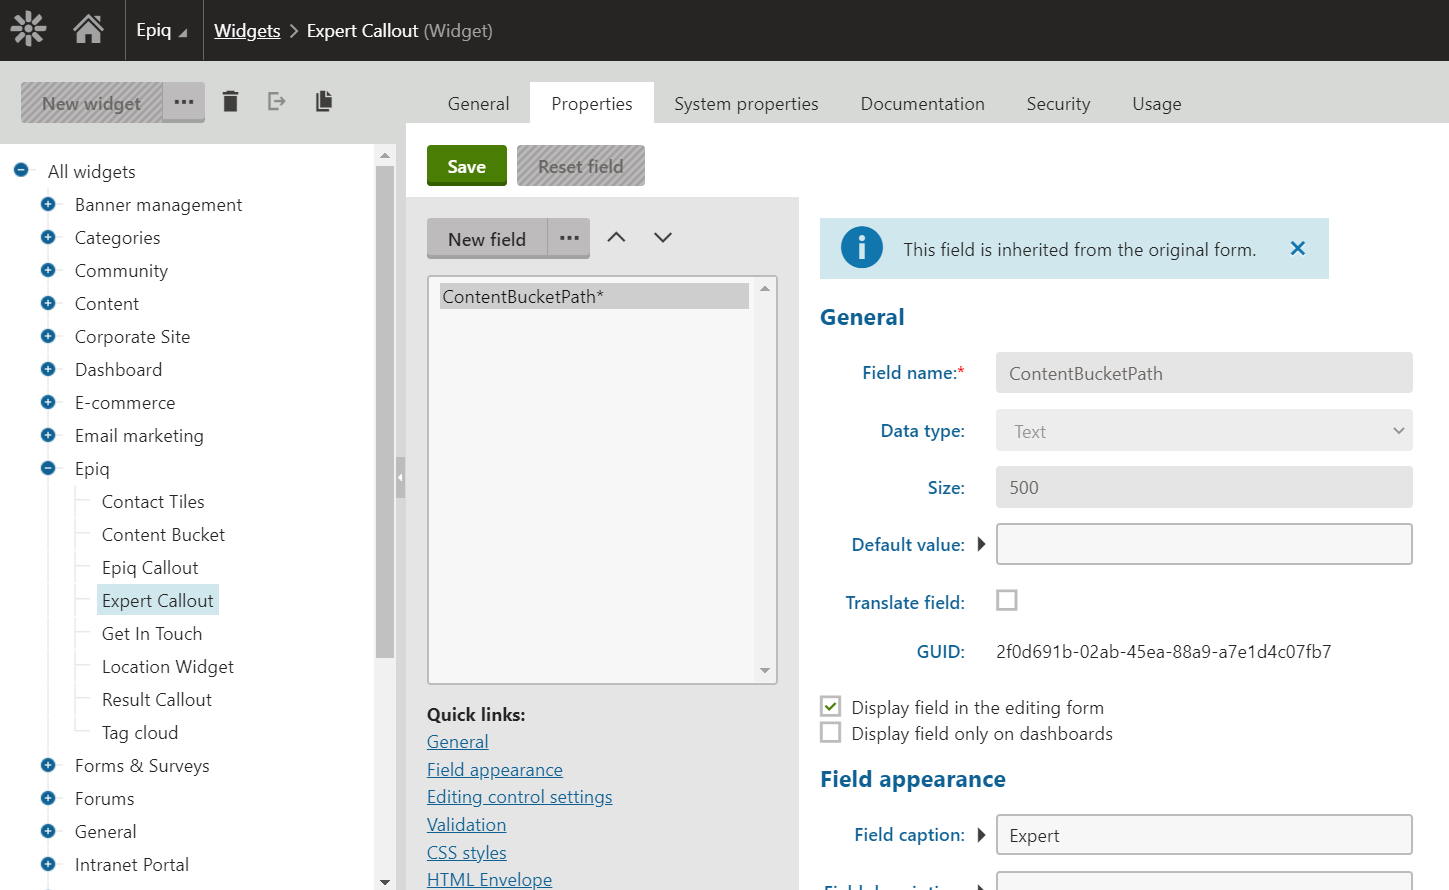
Webpart “properties” essentially allow you to parametrize and assign different values to a webpart. Based on these parameters that are assigned, the webpart would render differently. For example, you need to assign the relevant expert name to this webpart. So you create a property called “Expert” and assign this to the webpart. (screenshot below)
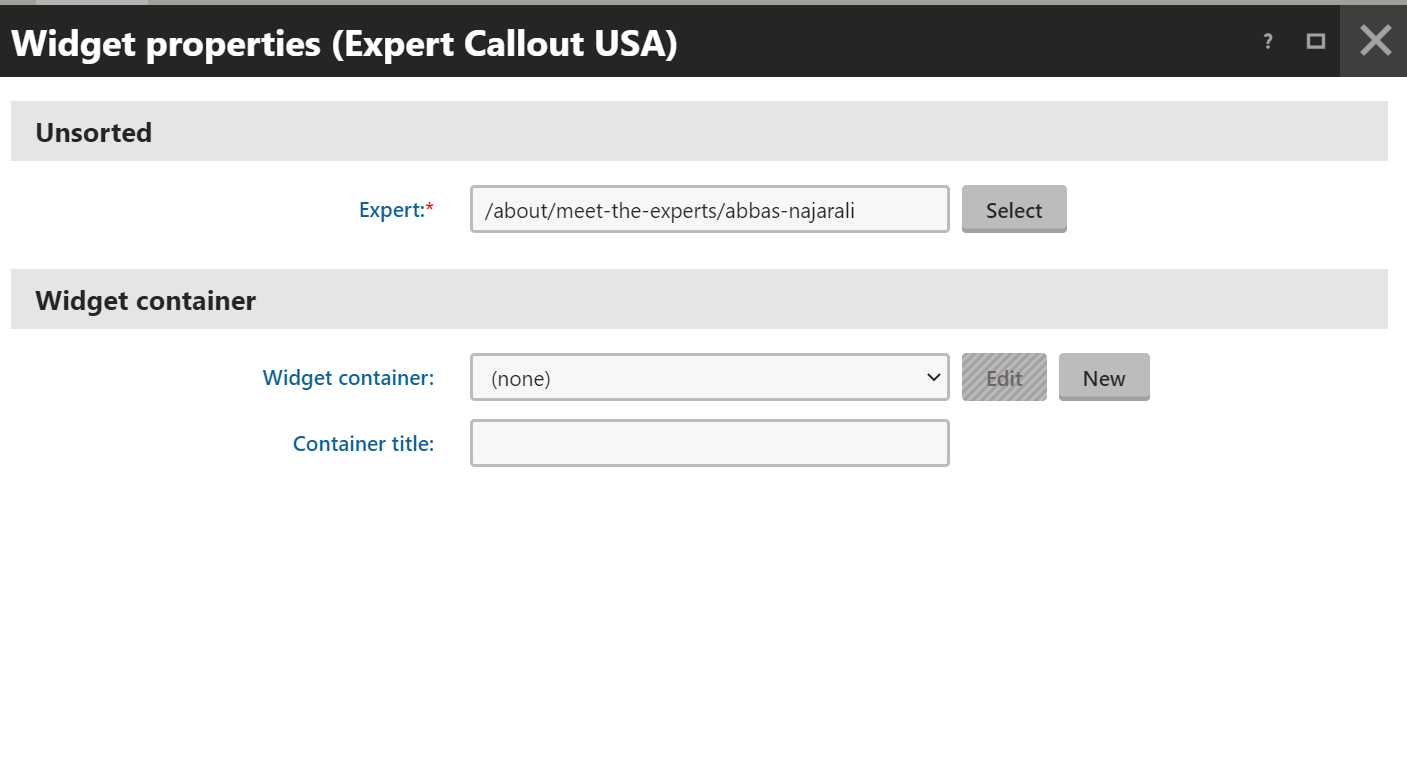
The image below shows how you can go about creating properties and assigning them to the webpart.
Create a Widget based on the Webpart
As shown below, you can create a Widget based on a Webpart. In this example, the Webpart is “Expert Callout”
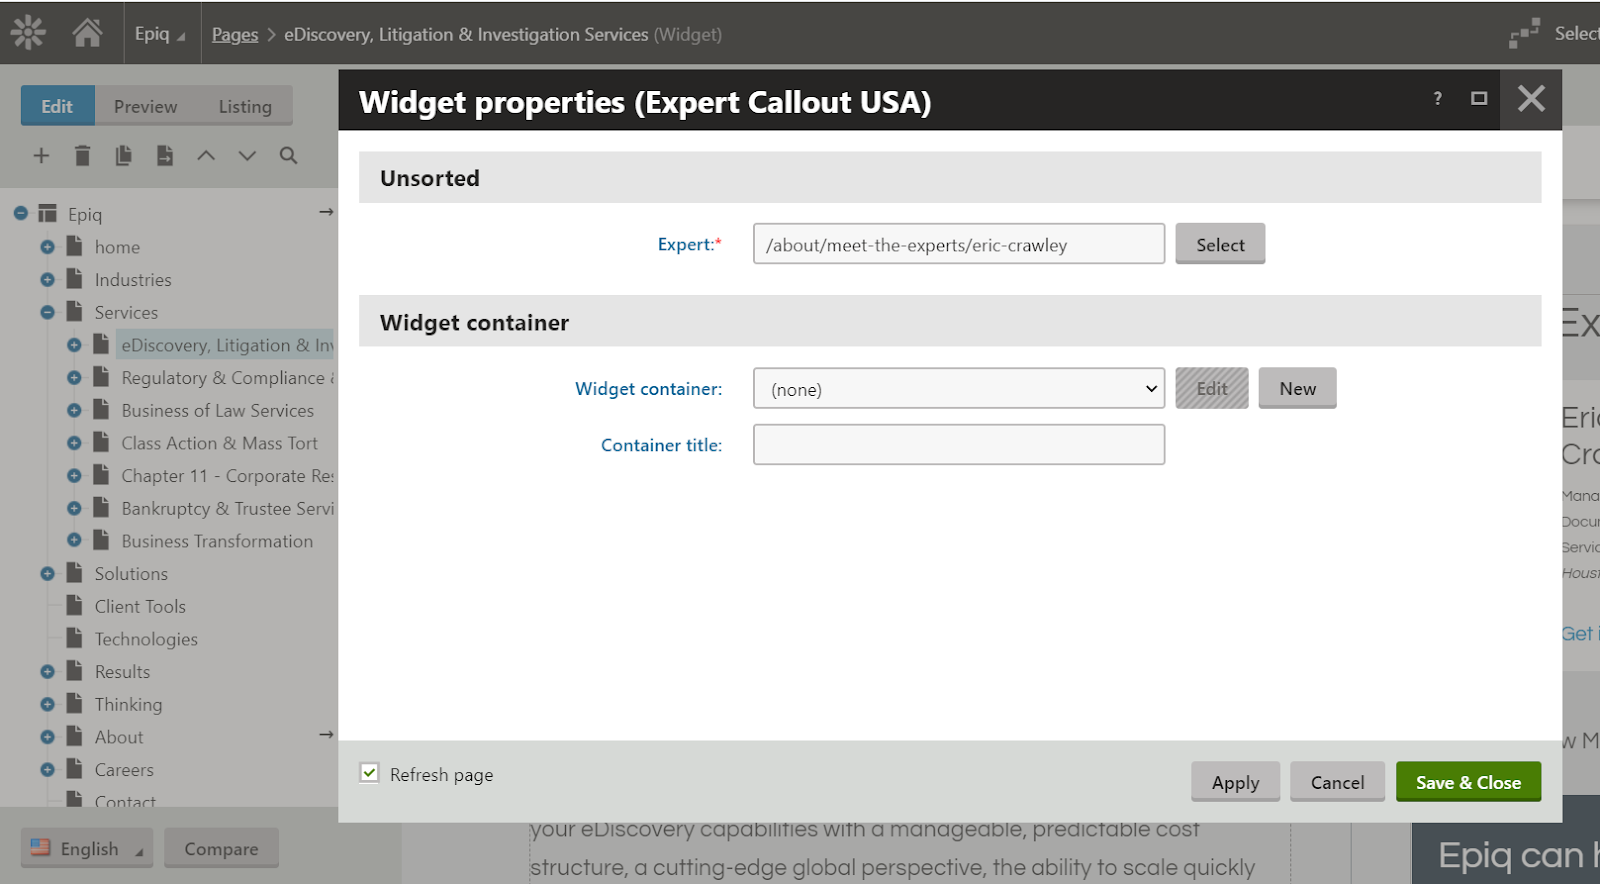
After you create the widgets, you can assign parameters to it, similar to how we described this process for a Webpart.
Finally, you can add the Widget to the template.
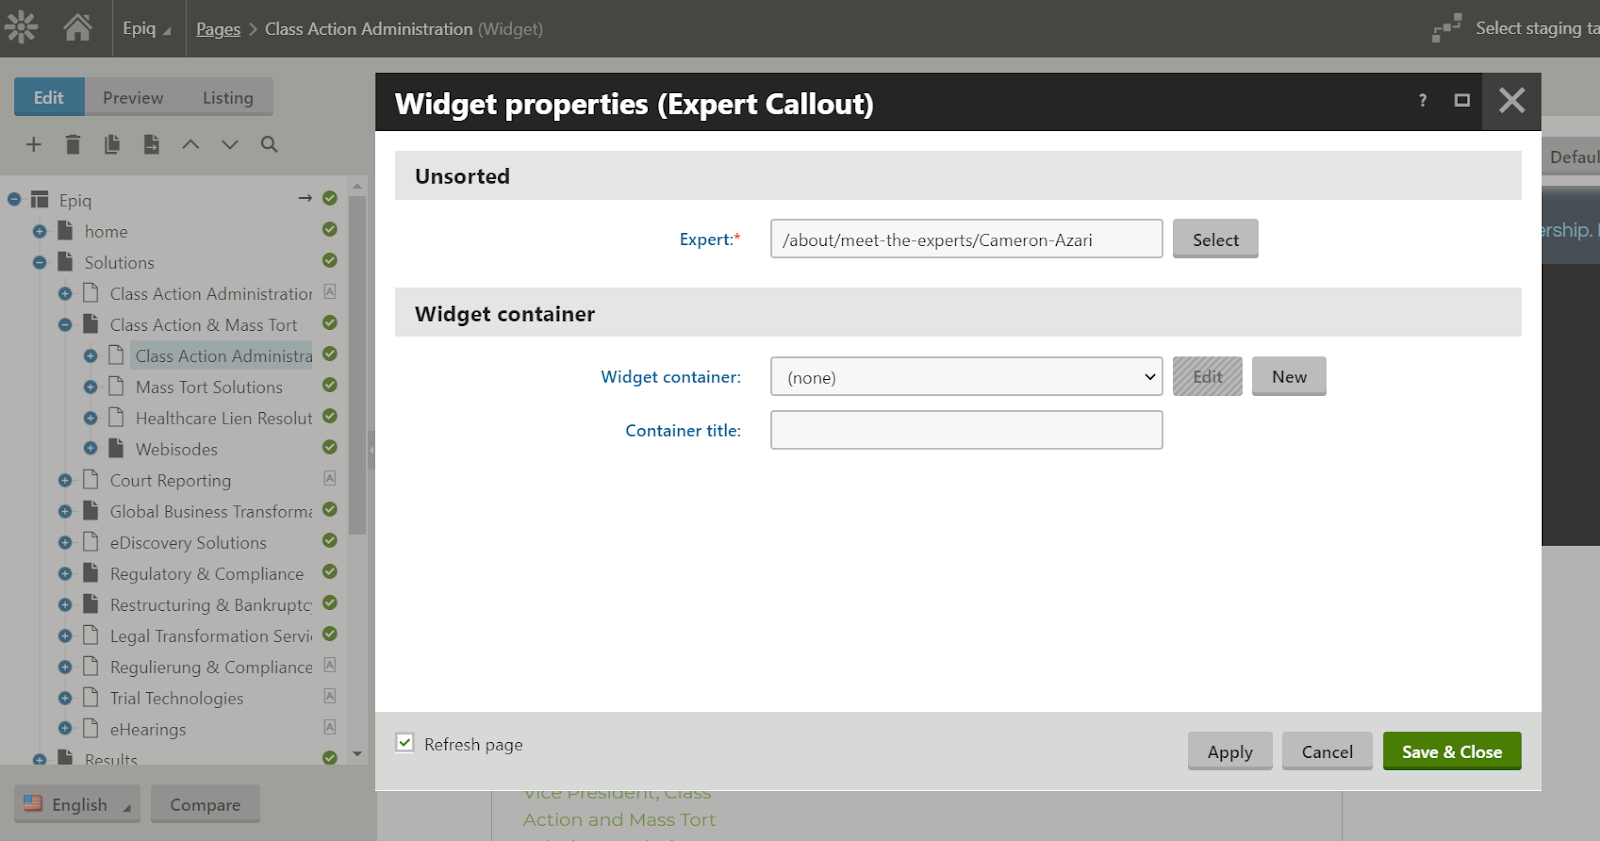
At this point, the content administrator will be able to create a page based on the template, and select the specific values for the Expert widget area.
The Final Content Manager Experience
In this section, we illustrate the actual experience of a content manager creating a page and assigning an expert to this page.
Step 1: Select a Services page from the Pages dashboard. You can see the Expert callout widget attached to the page. Now click on configure webpart.
Select the desired expert in the widget properties, as shown below. Click on Save and Close. You are done!
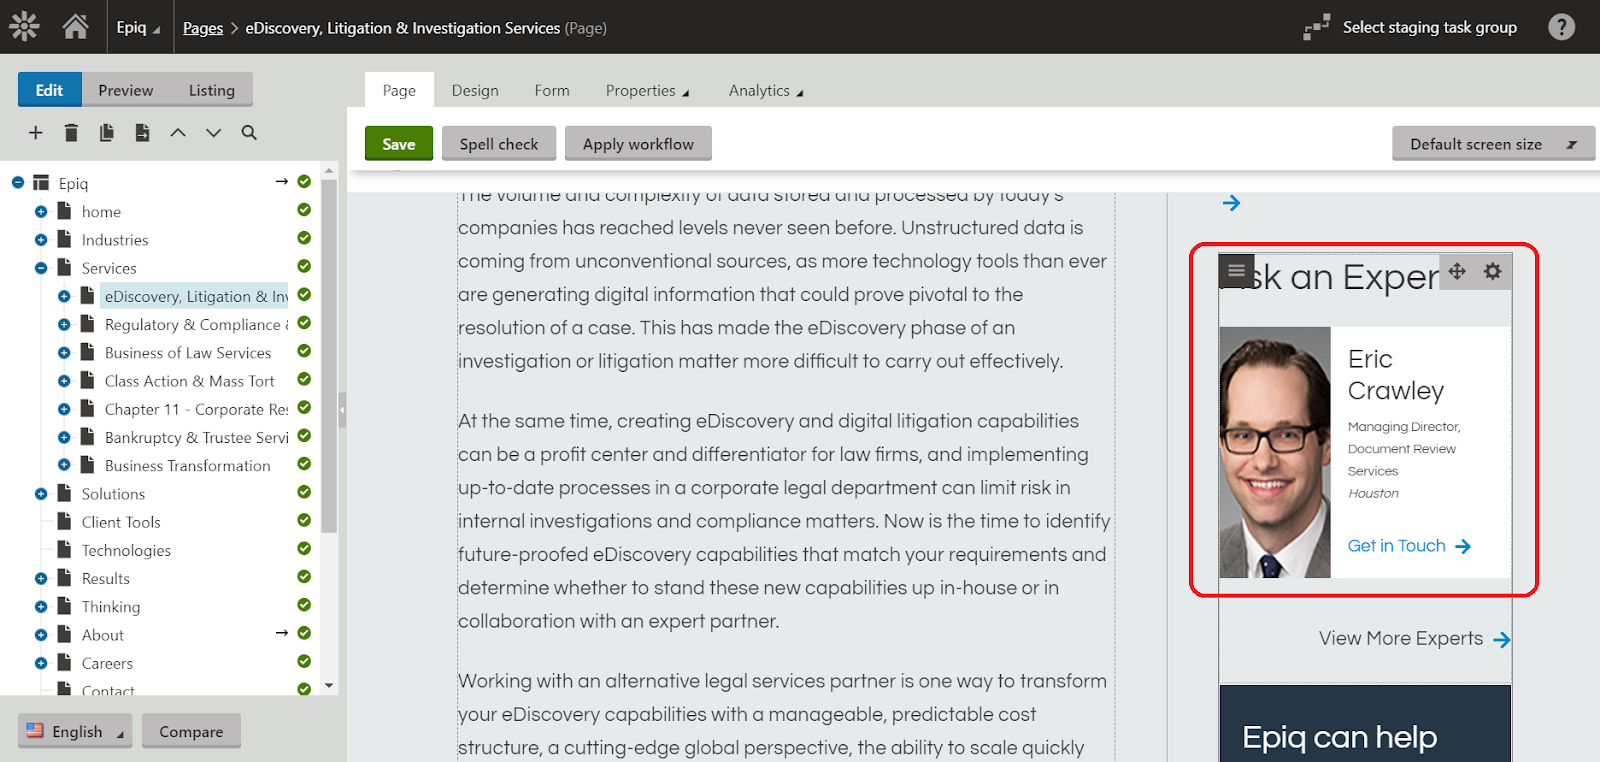
Now, the website user will see this page with the selected expert, as shown below.

if we need to change the design of expert card then we need to create country specific design. You can checkout our article about creating country specific kentico design here