How to transfer your domain from GoDaddy to Namecheap
Introduction
When you're building or growing a business, your first touch point is your domain name. Getting the right domain is the easy part; choosing the right domain registrar is the tricky part. At Exemplifi, we’ve tested multiple popular domain registrars and found that each has their own pros and cons. In this post, we focus on migrating a domain from GoDaddy to Namecheap. The migration process involves enabling transfer, generating an authentication code adding 2 Namecheap name servers in the current registrar, adding DNS records, and creating a transfer request in Namecheap. Read till the end to dive deep into the domain transfer process in detail.
Why transfer a domain from GoDaddy to Namecheap?
Most companies utilize the industry leader GoDaddy as their domain registrar, but never use their entire suite of value added services like email, Site builder etc. For example, our website is built on the Webflow page builder and our team collaborates through G-Suite, hence we didn’t need the additional service add-ons from Godady.
While GoDaddy introductory prices are low, they quickly ramp in the following years upto $70+/year. Namecheap on the hands costs only $35/year. With pricing and utilization in mind, we decided to migrate our domain name to Namecheap and share with you the easy steps to get it done.
The Process
Here is a summary of the 6 steps to transfer your domain along with further screenshots below
- Enable transfer in the current registrar
- Generate an authentication code in the current registrar
- Add 2 Namecheap name servers in the current registrar
- Add all DNS records in Namecheap
- Create a transfer request in Namecheap
Enable or Unlock transfer in the current registrar
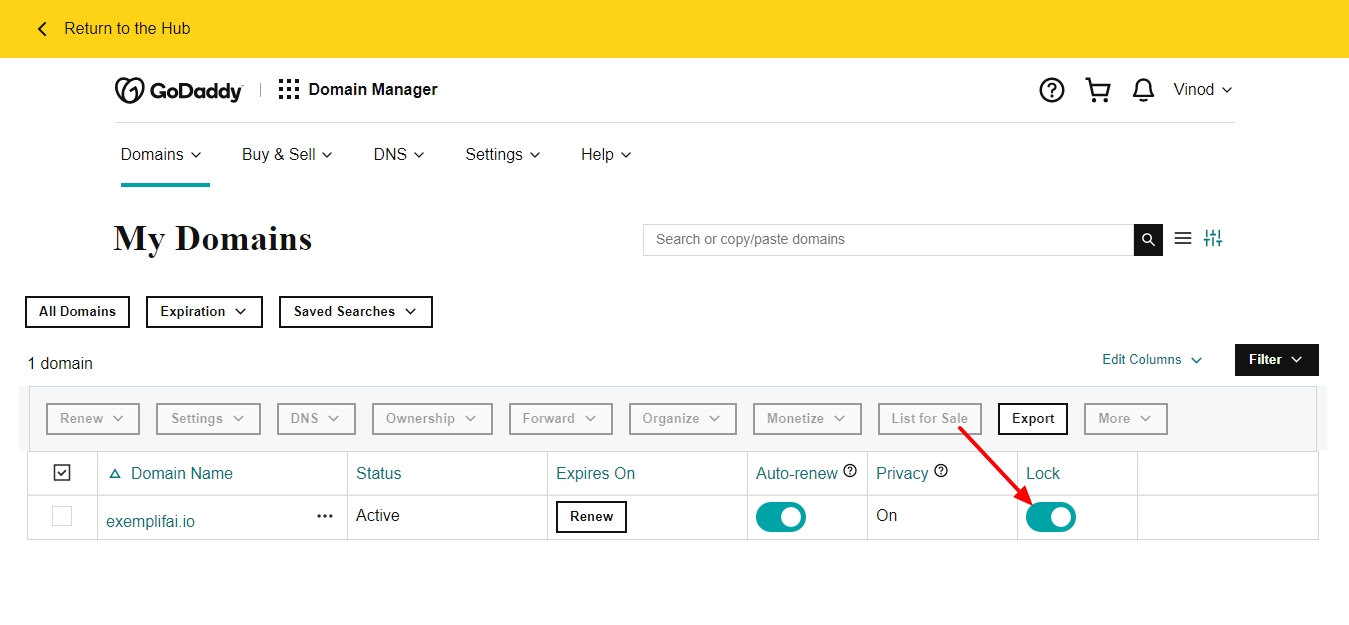
Login to your GoDaddy account and unlock the domain from the My Domains section
Generate authentication code
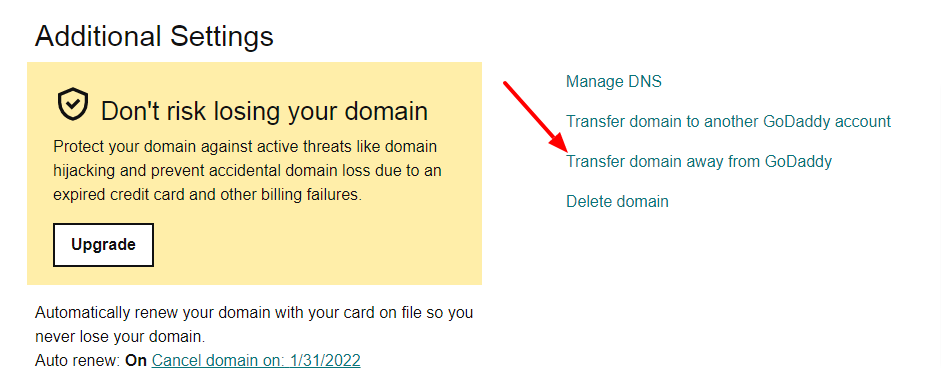
In GoDaddy, Open a particular domain and Click on Transfer domain away from GoDaddy
GoDaddy will then give instructions about the domain transfer checklist.
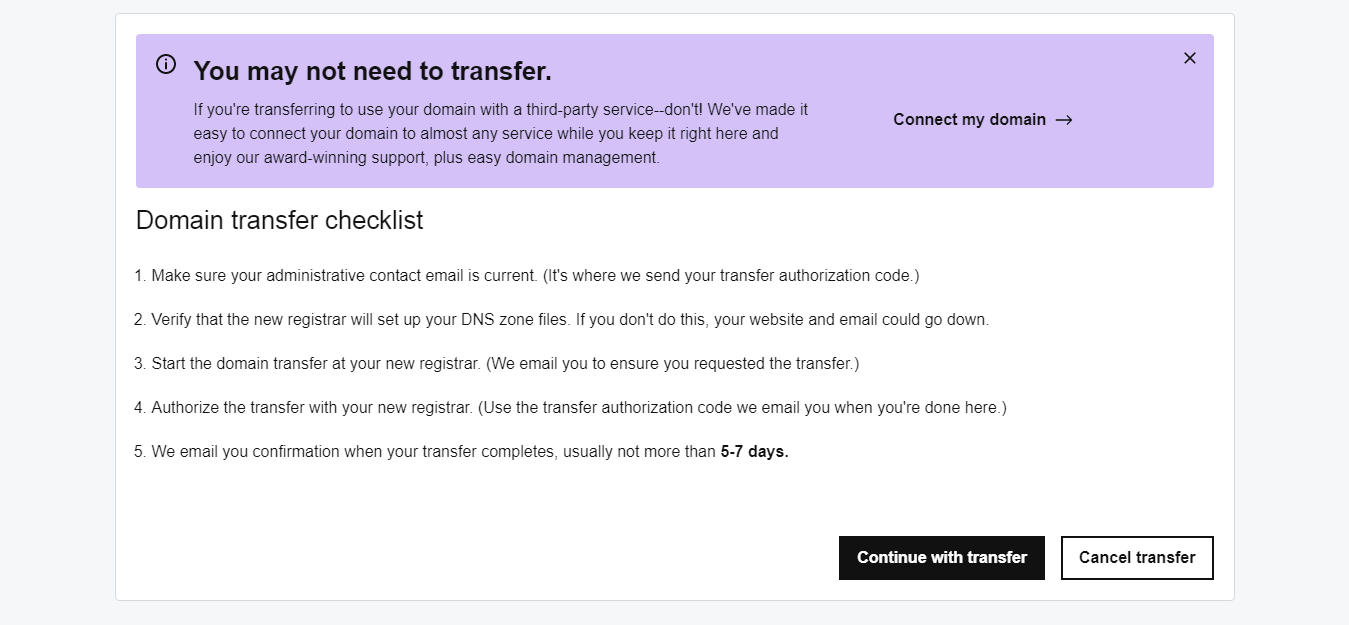
Make sure everything is fine before continuing, then click on Continue to Transfer.
In the next step, You will get the authentication code information to transfer
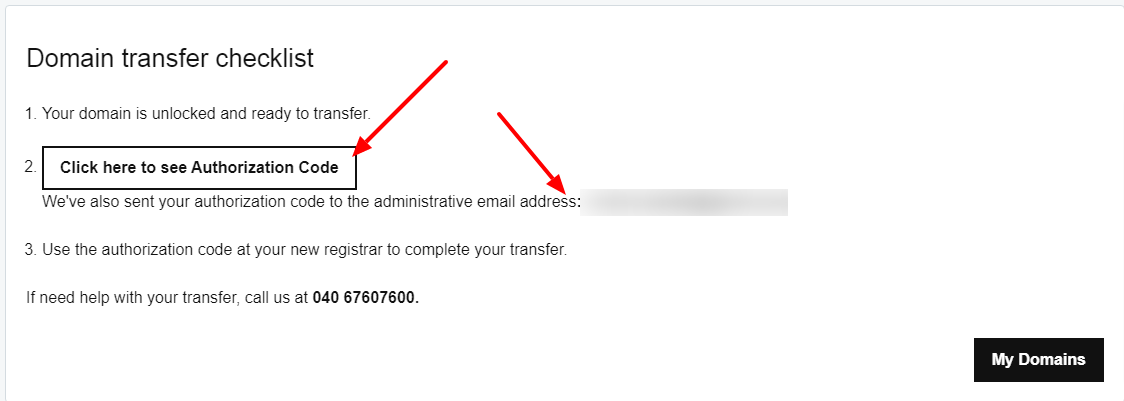
Add 2 Namecheap nameservers in GoDaddy
By adding the namecheap nameservers in GoDaddy, we end up drastically reducing website downtime, as well ensure that the transfer happens smoothly.
To get nameservers from Namecheap, Follow below steps
- Login into your Namecheap account
- From Menus, Click on Domains-> FreeDNS

Add your domain and follow the instructions
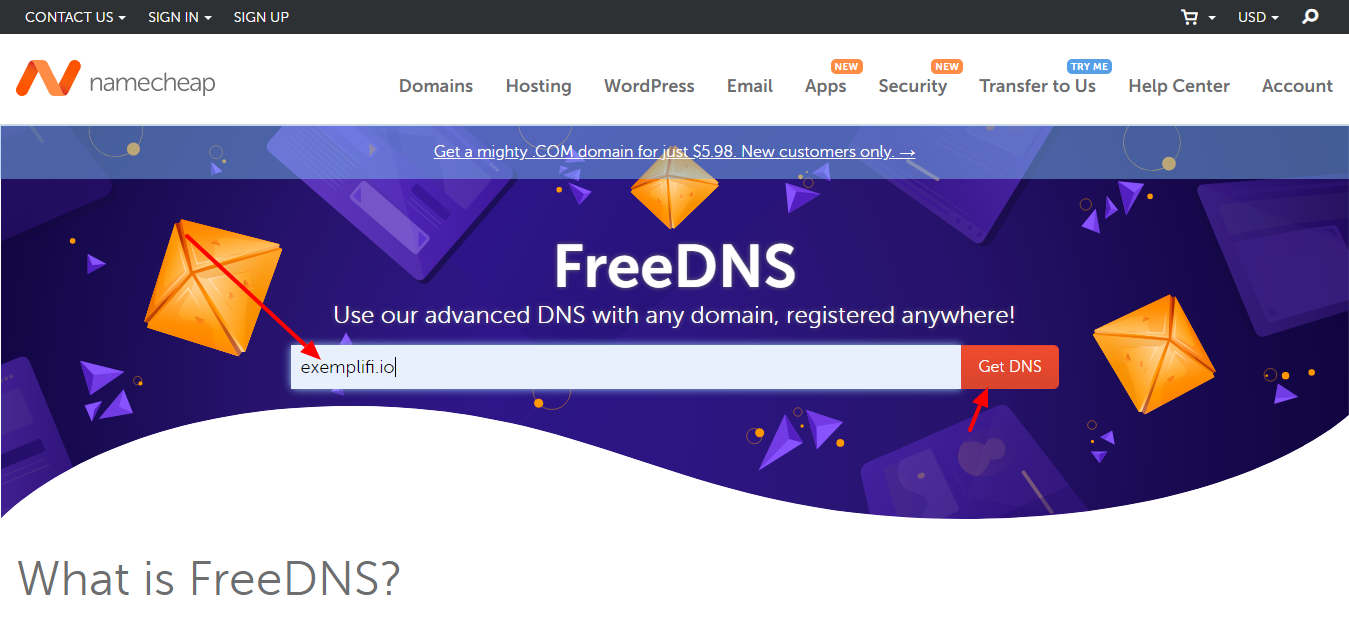
You will then get a few free nameservers records, copy any two of them.

In GoDaddy, create 2 NS records in the DNS section

Add DNS records in Namecheap
In the GoDaddy DNS section, Copy or download all DNS records ( A, CNAME, MX, TXT )

In your Namecheap account, Go to the domains list and click on Manage for specific domain
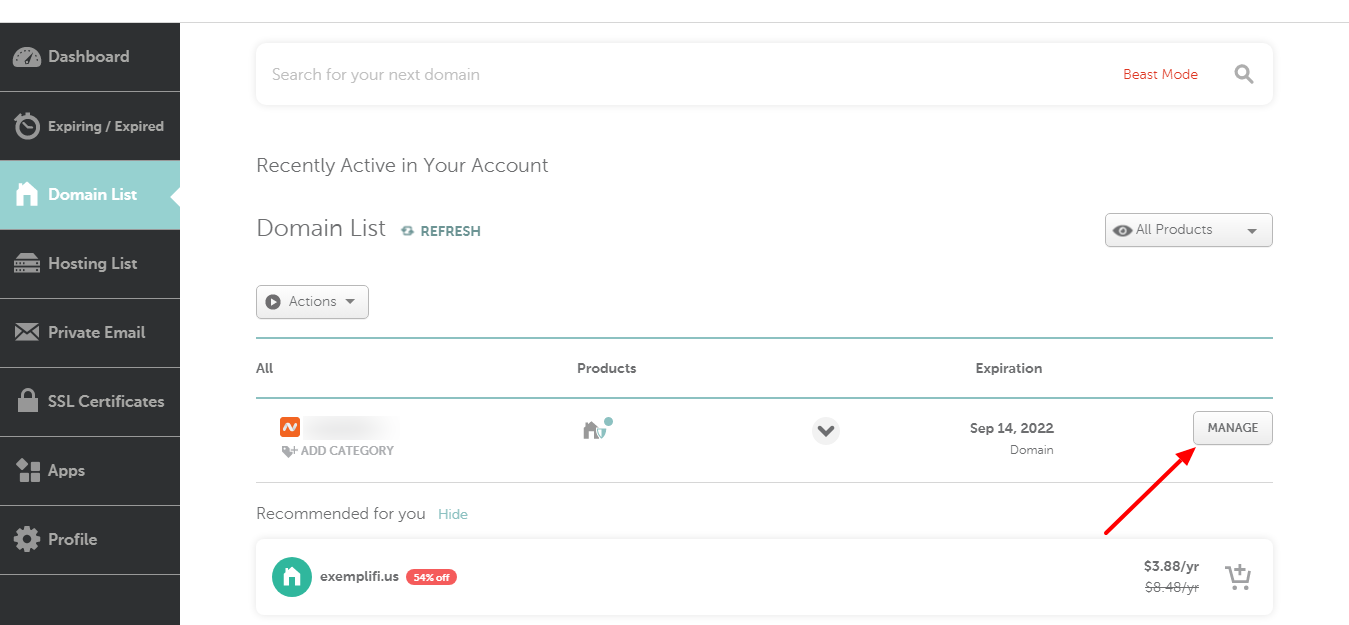
Click on Advanced DNS and add all your DNS records here
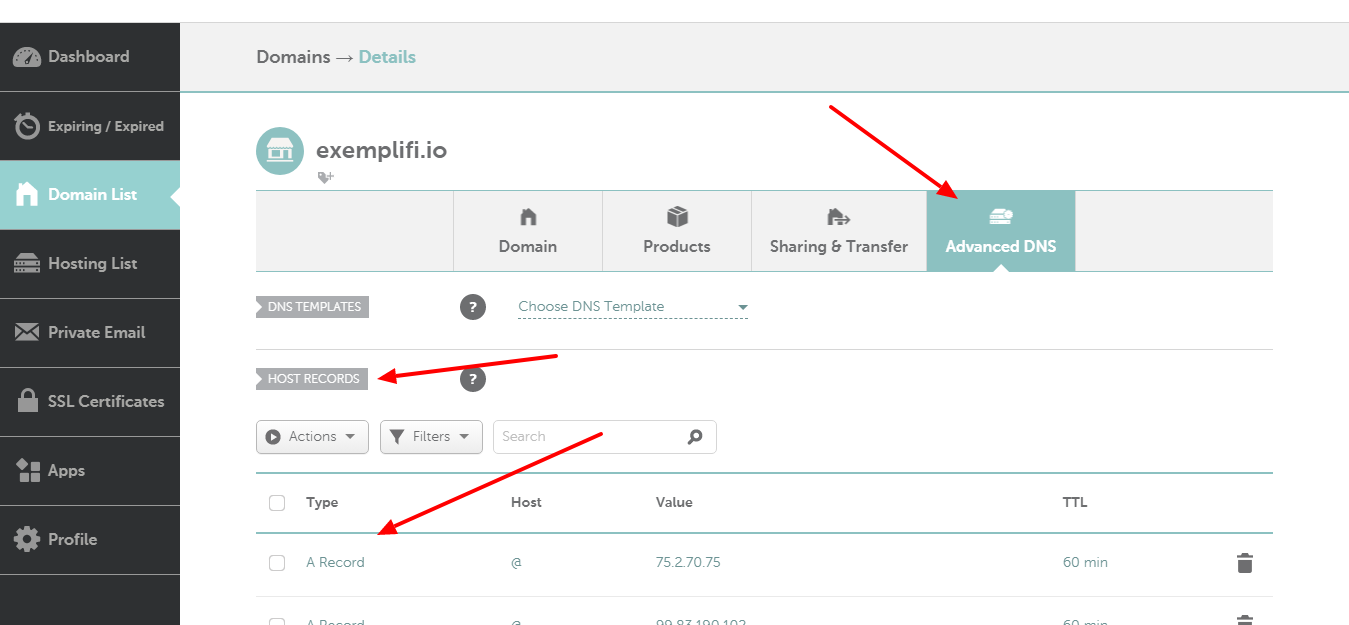
Create transfer request in Namecheap
Now create a transfer request in Namecheap
We would need to verify two key aspects here --
- Whether he domain is properly unlocked
- Input the correct authorization code
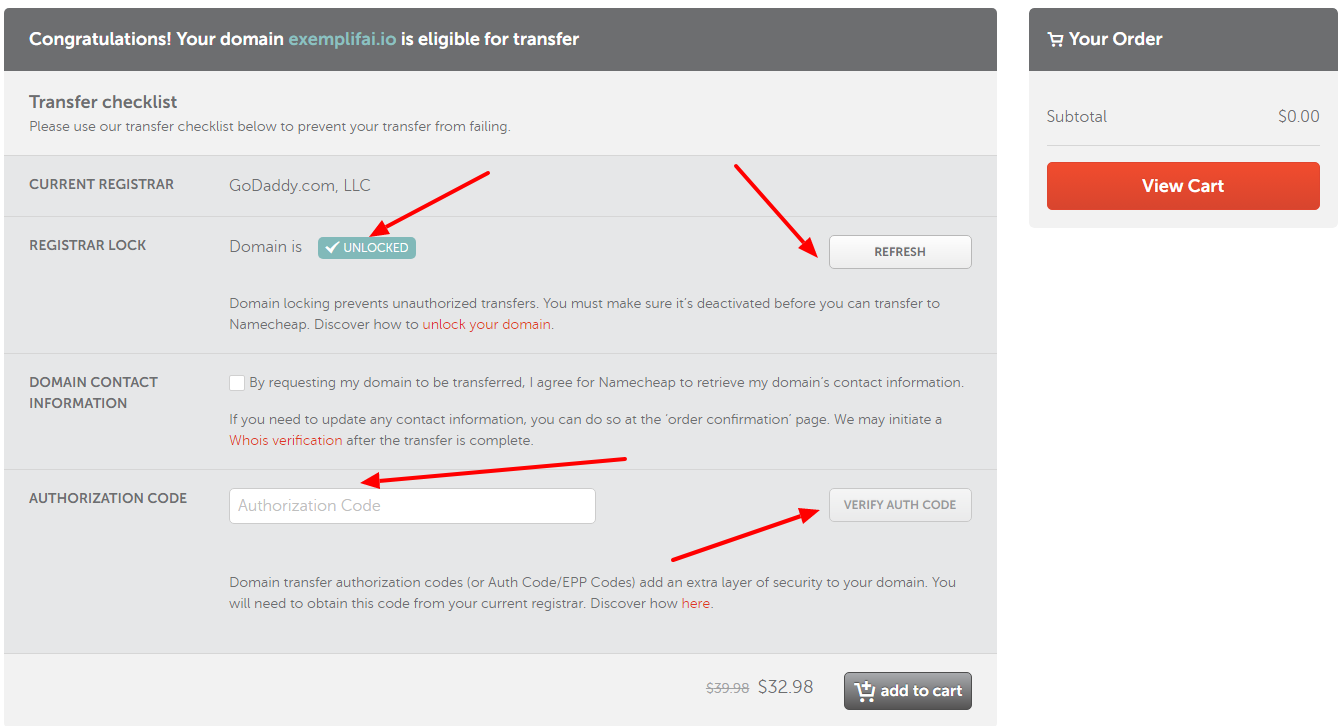
Once a request is created successfully, Namecheap will take care of the transfer and will update you by email.
We have to do one more step by selecting standard nameservers in Namecheap like below.

And you're done!
Transferring a domain from one registrar to another is easy If you follow the process correctly otherwise you face the risk of huge downtimes like 5 to 7 days. Additionally, choosing the right registrar for your needs is equally important in the long run. With these 5 steps you can easily migrate from one registrar to another fast and efficiently.
If you liked this article and have more questions or want more! Join us on LinkedIn, Twitter, Facebook, or our Newsletter.