Building a Customized Trip Planner Widget using AlpineJS

Introduction
In our last post we discussed how to design a customized trip planner widget for a website. In part II our continued series on building a customized trip planner widget series, we dive deeper into the technical aspects and development work that goes behind creating such a widget.
Trip Planner Widget
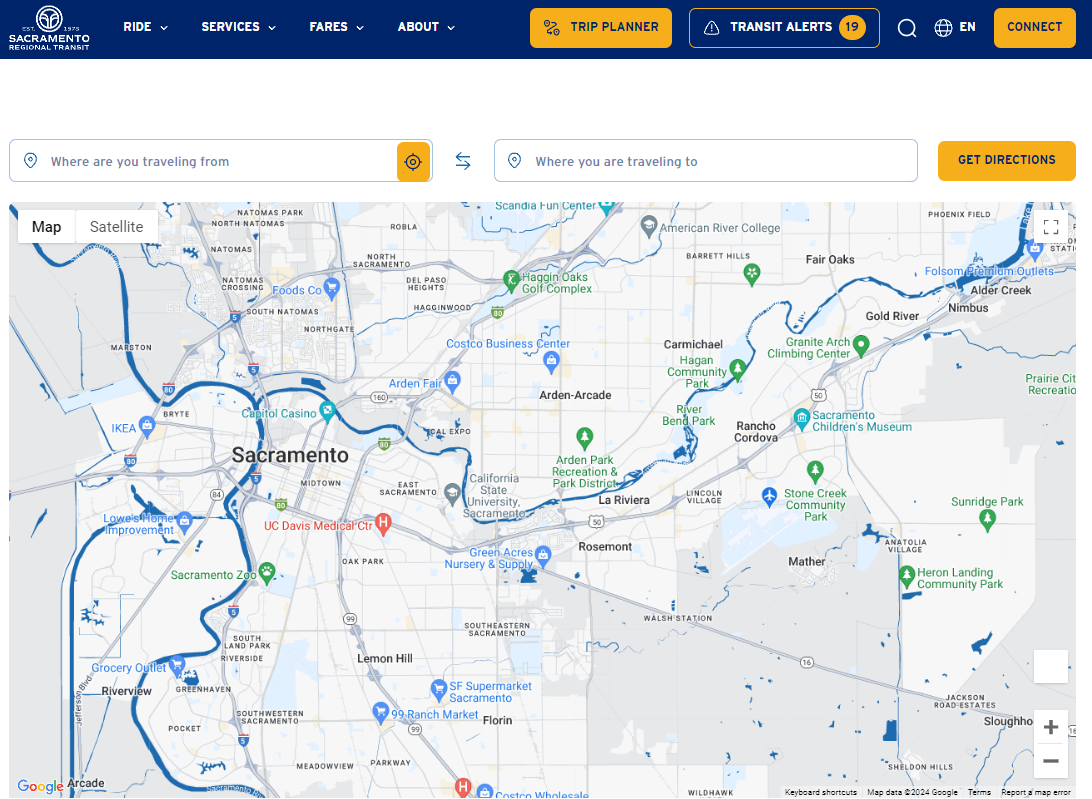
Our trip planner was designed to match the look and brand style of the Sacramento Regional Transit District website, as seen here. What's unique here is that while the maps are run through Google API’s the entire layout, color scheme, styling is customized and branded by us.

API’s used for the Trip Planner Widget
We used two main API’s to build this widget - GeoCode API and directions API.
- Google Maps Geocoding API
The Google Maps Geocoding API is a powerful tool that enables developers to convert addresses into geographic coordinates (latitude and longitude) and vice versa. This functionality, known as geocoding and reverse geocoding, is essential for mapping applications where precise location data is required. Whether you're placing a marker on a map, finding the closest locations to a user, or displaying a location's address based on coordinates, the Geocoding API ensures accurate and reliable results. In our case, when a user enters a location in the FROM and TO address bars, this API converts into a geographical latitude and longitudinal coordinates.
- Google Maps Directions API
The Google Maps Directions API provides developers with the capability to calculate routes between locations and deliver detailed directions, including turn-by-turn instructions. It supports multiple transportation modes such as driving, walking, cycling, and public transit, making it versatile for various use cases. The API also offers features like waypoints, traffic-aware routing, and alternative routes, enabling users to find the most efficient paths based on real-time conditions. In our case, it helps in trip planning, by identifying the shortest route between the TO and FROM locations, and any alternate possibilities.

For details, on how we customize the colors and styling of the map, visit our previous post on designing a customized trip planner.
Using Alpine JS for dynamic output
What most of the other travel map widgets do is that once the locations are input, they open the different route options in a new tab, which is basically just a google maps page with no customization. We have kept everything within a single screen for ease of use and all within the widget itself. We used Alpine.JS to build this functionality.
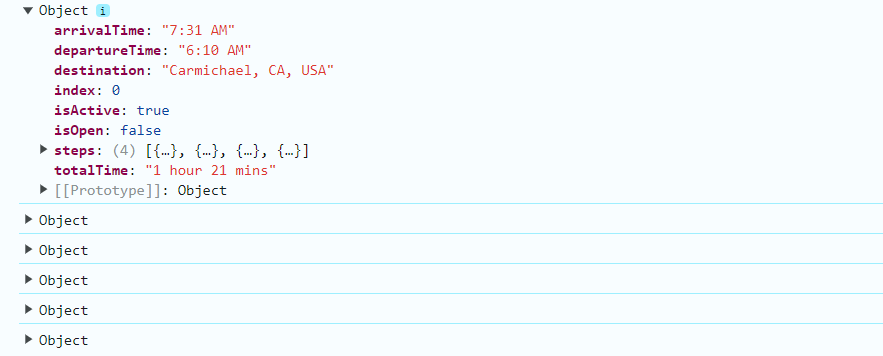
Once we select a FROM and TO location, we get a detailed list of routes, which are seen as multiple objects in the backend console ( You can access the console by pressing CTRL + SHIFT + J )

Each object corresponds to different route options with details like arrival and departure time, destination, duration and more. By default, the API sends out objects, pertaining to every mode of travel available including walking, driving, bus, trains and ferries.
We customized this output, by first passing it through a layer of complex filtering to only include walking, bus and trains in the route displayed. We did this to ensure that users of the Sacramento Regional Transit would have access to public transportation options available to them which was the goal with this project.
Alpine JS for templatised design

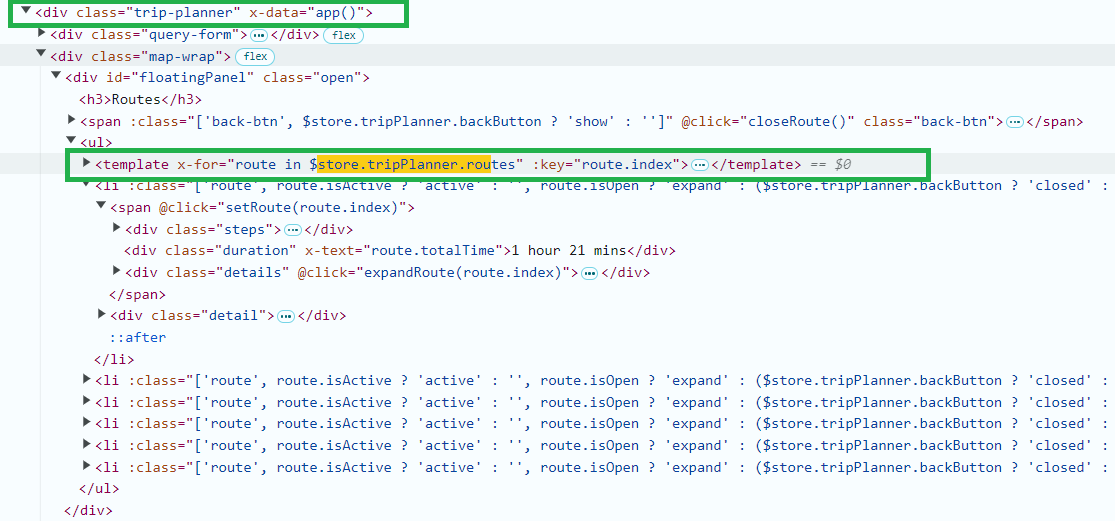
We used Alpine JS to create an application, where every time a class ( Route ) is selected or made active, the inherent variables within each class are automatically templatized in real time by the Alpine JS. We run this in a for loop, so every time a new route is selected, the variables are fed in realtime to Alpine JS and it applies the template to those variables.
The templated design here automatically applies our custom icons types, icon colors and route colors on the travel planner, giving its custom appearance.

The classes for each transit type are different based on the mode. For example, for walking, the “walking” class automatically picks up the icons and colors and passess them to the template to display. All of this is done on the fly with real time calculation and dynamic displays for total duration and sub section duration.
Executing the Alpine JS code in WordPress using shortcodes
First, you need to enqueue the Alpine JS script in your WordPress theme. You can add this in your functions.php file:
Include the Google Maps API in your theme's header.php file or enqueue it in functions.php:
Replace YOUR_API_KEY with your actual Google Maps API key.
Use a shortcode to inject your Alpine JS and Google Maps API code into any page or post. Add this to your functions.php file:
This code snippet creates a basic Google Map using Alpine JS for state management. You can place the [google_map] shortcode on any page or post to display the map.
You can enhance the initMap() function to fetch data from the Google Maps API and dynamically update the map and markers.
For example, you could add a method to fetch places and update the map markers based on the API response:
By combining Alpine JS with Google Maps API in this way, you can build an interactive map that dynamically updates based on parameters from the API, all within the WordPress environment.
Conclusion
By leveraging Alpine JS, many front-end challenges can be addressed swiftly, offering a high degree of customization and automation due to its unique templated structure. We've found that developing a customized trip planner widget becomes relatively straightforward, even across various CMS platforms, particularly WordPress.
